In a previous guide, I detailed the steps needed to create a Konami ID. In this guide, I’m going to show you how to display Japanese text correctly in Diorama Studio, Konami’s fantastic virtual action figure and diorama software, when using the Japanese program on a non-Japanese edition of Windows XP.
I must emphasise that this is entirely optional. It isn’t necessary to do this in order to get the program to run but it may make it easier for you to navigate through the program.
I must also point out changing the language settings on your Windows XP system may cause some non-Japanese programs to behave oddly and you might even lose some functionality in some programs. I therefore strongly recommend switching back to your original language settings once you’re done using Diorama Studio.
There are a couple of good guides out there that show you how to display Japanese text correctly in Japanese programs on a non-Japanese Windows XP system. However, if you’re interested only in displaying Japanese text correctly in Diorama Studio, there are a couple of steps in those guides you can omit and moreover, there is one step that is omitted in those guides.
Diorama Studio is part of the ShinkiNET suite of programs which include the ShinkiNET Launcher and Battle Rondo, the Busou Shinki online game. You cannot directly launch the Diorama Studio executable and you will have to go through the ShinkiNET Launcher to do so.
I mention this because displaying Japanese text correctly in Diorama Studio requires different steps compared to displaying Japanese text correctly in the ShinkiNET Launcher.
Before we begin, I’d just like to remind you that I’m not a Windows XP expert and I’m not tech support. I should not be held accountable for problems that may crop up. That said, I have successfully configured my system and I would like to share with you how I did it.
Displaying Japanese text in Diorama Studio
To display Japanese text correctly in Diorama Studio, you will have to install the files needed for Japanese language support in Windows XP and set the Regional setting of Windows XP to Japanese. You will probably need your Windows XP installation disc so make sure it’s close at hand.
First, go to the Start menu of Windows XP and click on Control Panel.
(If you have trouble accomplishing that first step, I would recommend stopping now and looking for a simpler guide. This guide presumes you have some working knowledge of configuring your Windows XP system.)
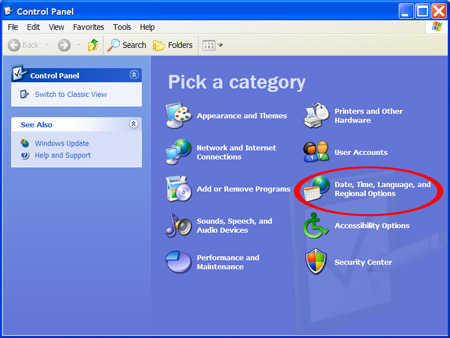
Click on “Date, Time, Language and Regional Options.”
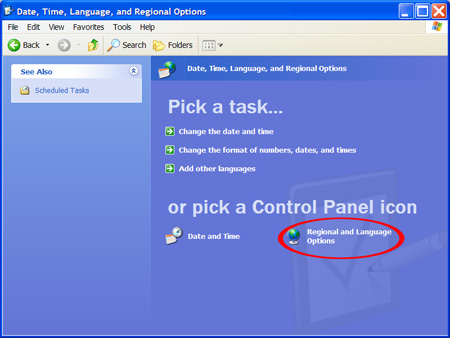
Click on “Regional and Language Options.”
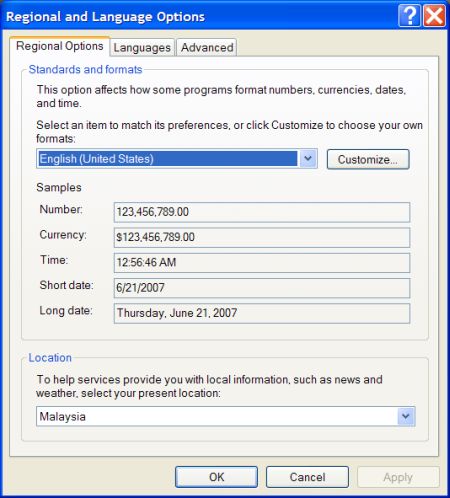
You should now see this:
Click on the Languages tab and check the “Install files for East Asian languages” check box.
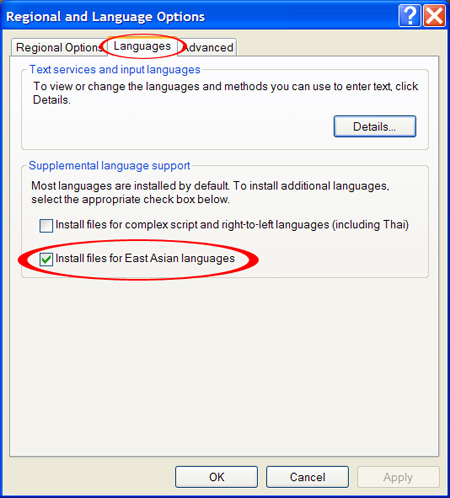
You should now be prompted for your Windows XP installation disc. After copying over the necessary files you will be asked to restart the system.
After you’ve restarted your system, go to “Regional and Language Options” again. (“Start Menu”, “Control Panel”, “Date, Time, Language and Regional Options”, “Regional and Language Options.”)
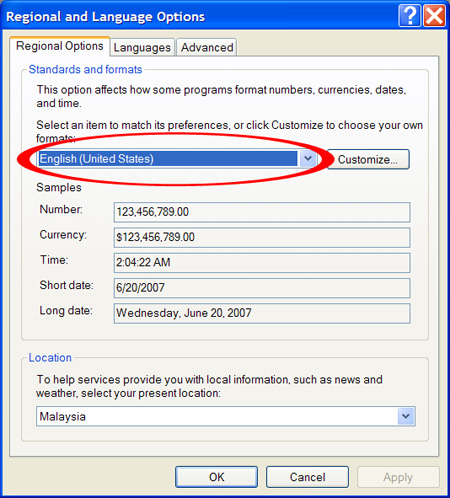
Take note of your current regional setting. As you can see, mine is set to “English (United States)”.
Select “Japanese” from the drop-down list and click on the “Apply” button at the bottom.
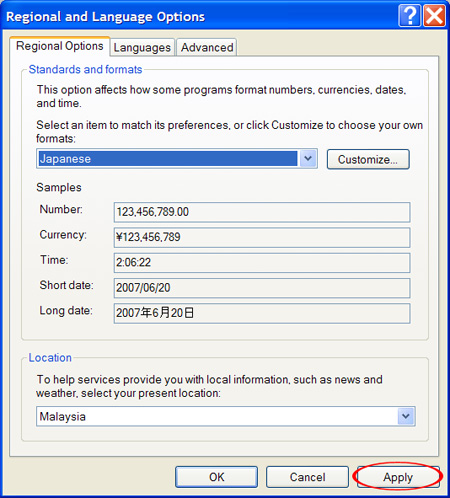
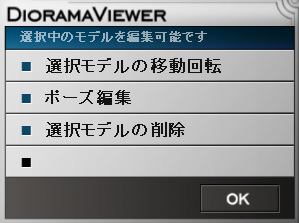
Diorama Studio should now correctly display Japanese text. So instead of seeing this:
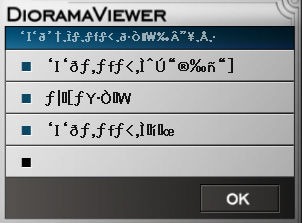
You will now see this:
Next, I’m going to show you how to display Japanese text correctly in the ShinkiNET Launcher and provide some recommendations to optimise things.

Thanks a lot for this. I was getting really tired of seeing nothing but questionmarks whenever your Shinki said something in Battle Rondo.
I’m glad you found it useful.
I did this(I have vista though :sulks:)and it didnt change the text on the shinki file.
Do I have to do it before installing?
Meimi132, you’ll have to clarify what you mean by “the shinki file”. Do you mean within the application, the program icon text on the Windows desktop or the ShinkiNet launcher?